
625 lines
23 KiB
Markdown
625 lines
23 KiB
Markdown
# Chaos Engineering for Microservices
|
||
|
||
- **期号**: SRE Weekly Issue #473(2025-04-20)
|
||
- **作者**: Prabhu Chinnasamy — DZone
|
||
- **链接**: https://feeds.dzone.com/link/23568/17003950/chaos-engineering-for-microservices
|
||
|
||
## 简介
|
||
|
||
> In this article, I’ll walk you through how we implemented chaos engineering across our stack using Chaos Toolkit, Chaos Monkey, and Istio — with hands-on examples for Java and Node.js. If you’re exploring ways to strengthen system resilience, this guide is packed with practical insights you can apply today.
|
||
|
||
The author does not appear to have a tie to Istio. This article has a ton of code snippets to help you get started.
|
||
|
||
## 正文
|
||
|
||
-
|
||
 [Post an Article](https://feeds.dzone.com/content/article/post.html)
|
||
-
|
||
[Manage My Drafts](https://feeds.dzone.com)
|
||
|
||
# Chaos Engineering for Microservices
|
||
|
||
Learn how to implement chaos engineering using Chaos Toolkit and Chaos Monkey for Java (Spring Boot), Node.js, Kubernetes, and Istio to enhance system resilience.
|
||
|
||
Join the DZone community and get the full member experience.
|
||
|
||
[Join For Free](https://feeds.dzone.com/static/registration.html)
|
||
|
||
As someone who works closely with distributed systems and microservices, I've seen firsthand how complex things can get once Kubernetes, Istio, and service meshes enter the picture. The shift to a cloud-native world is exciting, but it brings new challenges — especially around resilience.
|
||
|
||
We can't just hope things won’t fail — because they will. That’s where chaos engineering comes in. It’s a proactive way to build confidence in your system’s ability to handle real-world disruptions by intentionally injecting failure and observing how everything holds up.
|
||
|
||
As modern applications adopt microservices, Kubernetes, and service meshes like Istio, ensuring resilience becomes a critical challenge. Distributed architectures introduce new failure modes, which demand proactive testing to achieve high availability. Chaos engineering helps organizations identify and fix weaknesses before they impact users by introducing controlled failures to observe and improve system behavior.
|
||
|
||
For Java (Spring Boot) and Node.js applications, tools like Chaos Toolkit, Chaos Monkey, and Istio-based fault injection offer powerful ways to put chaos engineering into practice. Kubernetes-native chaos experiments — including pod failures, network latency injection, and region-based disruptions — allow teams to stress-test system stability at scale.
|
||
|
||
In this article, I’ll walk you through how we implemented chaos engineering across our stack using Chaos Toolkit, Chaos Monkey, and Istio — with hands-on examples for Java and Node.js. If you're exploring ways to strengthen system resilience, this guide is packed with practical insights you can apply today.
|
||
|
||
## What Is Chaos Engineering?
|
||
|
||
[Chaos engineering](https://dzone.com/articles/getting-started-with-chaos-engineering) is a discipline designed to proactively identify weaknesses in distributed systems by simulating real-world failures. The goal is to strengthen application resilience by running controlled experiments that help teams:
|
||
|
||
- Simulate the failure of an entire region or data center.
|
||
- Inject latency between services.
|
||
- Max out CPU cores to evaluate performance impact.
|
||
- Simulate file system I/O faults.
|
||
- Test application behavior when dependencies become unavailable.
|
||
- Observe the cascading impact of outages on microservices.
|
||
|
||
By incorporating chaos engineering practices, organizations can detect weaknesses before they impac **t production,** reducing downtime and improving system recovery time.
|
||
|
||
## Chaos Engineering Lifecycle
|
||
|
||
The process of conducting chaos engineering experiments follows a structured lifecycle:
|
||
|
||

|
||
|
||
|
||
*Figure 1: The chaos engineering lifecycle: A systematic approach to improving system resilience through continuous experimentation.*
|
||
|
||
This lifecycle ensures that failures are introduced methodically and improvements are made continuously.
|
||
|
||
## Chaos Toolkit vs. Chaos Monkey: Key Differences
|
||
|
||
**Chaos Toolkit** and **Chaos Monkey** are powerful tools in chaos engineering, but they have distinct use cases.
|
||
|
||
| Feature | chaos toolkit | chaos monkey for spring boot |
|
||
|---|---|---|
|
||
| Purpose | A versatile framework for multi-platform chaos testing | Specifically designed for injecting failures in **Spring Boot applications.** |
|
||
| Implementation | Uses declarative **JSON/YAML** experiments. | Configured via application.yml and Spring Boot actuator endpoints. |
|
||
| Language Support | Supports multiple environments and programming languages. | Primarily designed for Java and Spring Boot applications. |
|
||
| Types of Failures | Injects **network failures, pod terminations, latency, CPU stress, and custom-defined failures.** | Simulates latency, exceptions, and service failures |
|
||
| Integration | Works with **Kubernetes, Istio, Azure, Prometheus, etc.** | Directly integrates with **Spring Boot Actuator APIs.** |
|
||
| Configuration | Requires defining **experiments.json or experiments.yaml.** | Enabled using spring.profiles.active=chaos-monkey. |
|
||
|
||
## **When to Use Chaos Toolkit?**
|
||
|
||
- When working with Kubernetes-based deployments.
|
||
- When requiring multi-cloud or multi-language chaos testing.
|
||
- When defining custom failure scenarios for distributed environments.
|
||
|
||
## **When to Use Chaos Monkey?**
|
||
|
||
- When testing Spring Boot applications.
|
||
- When needing application-layer failures such as method-level latency and exceptions.
|
||
- When preferring a lightweight, built-in solution for Java-based microservices.
|
||
|
||
## **Chaos Toolkit: A Versatile Chaos Testing Framework**
|
||
|
||
### **Installation**
|
||
|
||
For Java and Node.js applications, install the Chaos Toolkit CLI:
|
||
|
||
Plain Text
|
||
|
||
|
||
|
||
`pip install chaostoolkit`
|
||
|
||
To integrate Kubernetes-based chaos testing:
|
||
|
||
Plain Text
|
||
|
||
|
||
|
||
`pip install chaostoolkit-kubernetes`
|
||
|
||
For Istio-based latency injection:
|
||
|
||
Plain Text
|
||
|
||
|
||
|
||
`pip install -U chaostoolkit-istio`
|
||
|
||
To validate application health using Prometheus:
|
||
|
||
Plain Text
|
||
|
||
|
||
|
||
`pip install -U chaostoolkit-prometheus`
|
||
|
||
## **Chaos Monkey for Spring Boot**
|
||
|
||
The below diagram illustrates how Chaos Monkey for Spring Boot integrates with different components of a Spring Boot application to inject failures and assess resilience.
|
||
|
||
On the left, it shows the key layers of a typical Spring Boot application, including `@Controller`, `@Repository`, `@Service`, and `@RestController`, which represent the web, business logic, and data access layers. These components are continuously monitored by **Chaos Monkey Watchers**, which include Controller Watcher, Repository Watcher, Service Watcher, and RestController Watcher. These watchers track activity within their respective layers and enable Chaos Monkey to introduce failures dynamically.
|
||
|
||
On the right, the diagram depicts different types of chaos assaults that can be triggered, such as Latency Assault, which introduces artificial delays in request processing; Exception Assault, which injects random exceptions into methods; and KillApp Assault, which simulates a complete application crash. By leveraging these chaos experiments, teams can validate how well their Spring Boot applications handle unexpected failures and improve system resilience. This visualization helps in understanding the failure injection points within a Spring Boot application and highlights how Chaos Monkey enables fault tolerance testing in real-world scenarios.
|
||
|
||

|
||
|
||
|
||
*Figure 2: Chaos Monkey in a Spring Boot Application: Injecting failures at different layers—Controller, Service, Repository — to test resilience.*
|
||
|
||
### **Installation**
|
||
|
||
Add the following dependency to your Spring Boot project (pom.xml):
|
||
|
||
XML
|
||
|
||
|
||
|
||
```
|
||
<dependency>
|
||
<groupId>de.codecentric</groupId>
|
||
<artifactId>chaos-monkey-spring-boot</artifactId>
|
||
<version>2.5.4</version>
|
||
</dependency>
|
||
```
|
||
|
||
Enable Chaos Monkey in application.yml:
|
||
|
||
YAML
|
||
|
||
|
||
|
||
```
|
||
spring:
|
||
profiles:
|
||
active: chaos-monkey
|
||
chaos:
|
||
monkey:
|
||
enabled: true
|
||
assaults:
|
||
level: 3
|
||
latency-active: true
|
||
latency-range-start: 2000
|
||
latency-range-end: 5000
|
||
exceptions-active: true
|
||
watcher:
|
||
controller: true
|
||
service: true
|
||
repository: true
|
||
```
|
||
|
||
## **Running Chaos Monkey in Spring Boot**
|
||
|
||
Start the application with:
|
||
|
||
Plain Text
|
||
|
||
|
||
|
||
`mvn spring-boot:run -Dspring.profiles.active=chaos-monkey`
|
||
|
||
To manually enable Chaos Monkey attacks via Spring Boot Actuator endpoints:
|
||
|
||
Plain Text
|
||
|
||
|
||
|
||
`curl -X POST http://localhost:8080/actuator/chaosmonkey/enable`
|
||
|
||
To introduce latency or exceptions, configure assaults dynamically:
|
||
|
||
Plain Text
|
||
|
||
|
||
|
||
`curl -X POST http://localhost:8080/actuator/chaosmonkey/assaults \ -H "Content-Type: application/json" \ -d '{ "latencyActive": true, "exceptionsActive": true, "level": 5 }'`
|
||
|
||
## **Chaos Engineering in Node.js: Implementing Chaos Monkey and Chaos Toolkit**
|
||
|
||
While Chaos Monkey for Spring Boot is widely used for Java applications, Node.js applications can also integrate chaos engineering principles using Chaos Toolkit and Node-specific libraries.
|
||
|
||
### **Chaos Monkey for Node.js**
|
||
|
||
For Node.js applications, the Chaos Monkey functionality can be introduced using third-party libraries.
|
||
|
||
#### **Installation for Node.js**
|
||
|
||
To install the Chaos Monkey library for Node.js:
|
||
|
||
JavaScript
|
||
|
||
|
||
|
||
`npm install chaos-monkey --save`
|
||
|
||
#### **Basic Usage in a Node.js Application**
|
||
|
||
JavaScript
|
||
|
||
|
||
|
||
```
|
||
const express = require("express");
|
||
const chaosMonkey = require("chaos-monkey");
|
||
const app = express();
|
||
app.use(chaosMonkey()); // Injects random failures
|
||
app.get("/", (req, res) => {
|
||
res.send("Hello, Chaos Monkey!");
|
||
});
|
||
app.listen(3000, () => {
|
||
console.log("App running on port 3000");
|
||
});
|
||
```
|
||
|
||
**What does this do?**
|
||
|
||
- Injects random latency delays.
|
||
- Throws random exceptions in endpoints.
|
||
- Simulates network failures.
|
||
|
||
## **Configuring Chaos Monkey for Controlled Experiments in Node.js**
|
||
|
||
To have more control **over chaos injection**, you can define specific failure types.
|
||
|
||
### **Configuring Failure Injection**
|
||
|
||
chaosMonkey.config.js:
|
||
|
||
JavaScript
|
||
|
||
|
||
|
||
```
|
||
module.exports = {
|
||
latency: {
|
||
enabled: true,
|
||
minMs: 500,
|
||
maxMs: 3000,
|
||
},
|
||
exceptions: {
|
||
enabled: true,
|
||
probability: 0.2, // 20% chance of exception
|
||
},
|
||
killProcess: {
|
||
enabled: false, // Prevents killing the process
|
||
},
|
||
};
|
||
```
|
||
|
||
Now, modify the server.js file to load the configuration:
|
||
|
||
JavaScript
|
||
|
||
|
||
|
||
```
|
||
const express = require("express");
|
||
const chaosMonkey = require("chaos-monkey");
|
||
const config = require("./chaosMonkey.config");
|
||
const app = express();
|
||
app.use(chaosMonkey(config)); // Inject failures based on configuration
|
||
app.get("/", (req, res) => {
|
||
res.send("Chaos Engineering in Node.js is running!");
|
||
});
|
||
app.listen(3000, () => {
|
||
console.log("App running on port 3000 with Chaos Monkey");
|
||
});
|
||
```
|
||
|
||
## **Chaos Toolkit for Node.js Applications**
|
||
|
||
Similar to Kubernetes and Java applications, Chaos Toolkit can be used to inject failures into Node.js services.
|
||
|
||
### **Example: Latency Injection for Node.js using Chaos Toolkit**
|
||
|
||
This Chaos Toolkit experiment will introduce latency into a Node.js service.
|
||
|
||
JSON
|
||
|
||
|
||
|
||
```
|
||
{
|
||
"title": "Introduce artificial latency in Node.js service",
|
||
"description": "Test how the Node.js API handles slow responses.",
|
||
"method": [
|
||
{
|
||
"type": "action",
|
||
"name": "introduce-latency",
|
||
"provider": {
|
||
"type": "process",
|
||
"path": "curl",
|
||
"arguments": [
|
||
"-X",
|
||
"POST",
|
||
"http://localhost:3000/chaosmonkey/enable-latency"
|
||
]
|
||
}
|
||
}
|
||
],
|
||
"rollbacks": [
|
||
{
|
||
"type": "action",
|
||
"name": "remove-latency",
|
||
"provider": {
|
||
"type": "process",
|
||
"path": "curl",
|
||
"arguments": [
|
||
"-X",
|
||
"POST",
|
||
"http://localhost:3000/chaosmonkey/disable-latency"
|
||
]
|
||
}
|
||
}
|
||
]
|
||
}
|
||
```
|
||
|
||
To execute and report the experiment:
|
||
|
||
JSON
|
||
|
||
|
||
|
||
```
|
||
chaos run node-latency-experiment.json --journal-path=node-latency-journal.json
|
||
chaos report --export-format=json node-latency-journal.json > node-latency-report.json
|
||
```
|
||
|
||
## **Chaos Experiments in Multi-Cloud and Kubernetes Environments**
|
||
|
||
For microservices deployed on Kubernetes or multi-cloud platforms, Chaos Toolkit provides a more robust way to perform failover testing.
|
||
|
||

|
||
|
||
|
||
*Figure 3: Chaos toolkit experiment execution flow: A structured approach to injecting failures and observing system behavior.*
|
||
|
||
For microservices deployed on Kubernetes or multi-cloud platforms, Chaos Toolkit provides a more robust way to perform failover testing.
|
||
|
||
A **pod-kill experiment** to test application resilience in Kubernetes:
|
||
|
||
JSON
|
||
|
||
|
||
|
||
```
|
||
{
|
||
"version": "1.0.0",
|
||
"title": "System Resilience to Pod Failures",
|
||
"description": "Can the system survive a pod failure?",
|
||
"configuration": {
|
||
"app_name": { "type": "env", "key": "APP_NAME" },
|
||
"namespace": { "type": "env", "key": "NAMESPACE" }
|
||
},
|
||
"steady-state-hypothesis": {
|
||
"title": "Application must be up and healthy",
|
||
"probes": [{
|
||
"name": "check-application-health",
|
||
"type": "probe",
|
||
"provider": {
|
||
"type": "http",
|
||
"url": "http://myapp.com/health",
|
||
"method": "GET"
|
||
}
|
||
}]
|
||
},
|
||
"method": [{
|
||
"type": "action",
|
||
"name": "terminate-pod",
|
||
"provider": {
|
||
"type": "python",
|
||
"module": "chaosk8s.pod.actions",
|
||
"func": "terminate_pods",
|
||
"arguments": {
|
||
"label_selector": "app=${app_name}",
|
||
"ns": "${namespace}",
|
||
"rand": true,
|
||
"mode": "fixed",
|
||
"qty": 1
|
||
}
|
||
}
|
||
}]
|
||
}
|
||
```
|
||
|
||
### **Running the Chaos Experiment**
|
||
|
||
To execute the experiment, run:
|
||
|
||
JSON
|
||
|
||
|
||
|
||
`chaos run pod-kill-experiment.json --journal-path=pod-kill-experiment-journal.json`
|
||
|
||
To generate a report after execution:
|
||
|
||
JSON
|
||
|
||
|
||
|
||
`chaos report --export-format=html pod-kill-experiment-journal.json > pod-kill-experiment-report.html`
|
||
|
||
Rolling back the experiment (if necessary):
|
||
|
||
JSON
|
||
|
||
|
||
|
||
`chaos rollback pod-kill-experiment.json`
|
||
|
||
### **Example: Region Delay Experiment (Kubernetes and Istio)**
|
||
|
||
This experiment injects **network latency** into requests by modifying Istio’s virtual service.
|
||
|
||
YAML
|
||
|
||
|
||
|
||
```
|
||
version: "1.0.0"
|
||
title: "Region Delay Experiment"
|
||
description: "Simulating high latency in a specific region"
|
||
method:
|
||
- type: action
|
||
name: "inject-fault"
|
||
provider:
|
||
type: python
|
||
module: chaosistio.fault.actions
|
||
func: add_delay_fault
|
||
arguments:
|
||
virtual_service_name: "my-service-vs"
|
||
fixed_delay: "5s"
|
||
percentage: 100
|
||
ns: "default"
|
||
pauses:
|
||
before: 5
|
||
after: 20
|
||
rollbacks:
|
||
- type: action
|
||
name: "remove-fault"
|
||
provider:
|
||
type: python
|
||
module: chaosistio.fault.actions
|
||
func: remove_delay_fault
|
||
arguments:
|
||
virtual_service_name: "my-service-vs"
|
||
ns: "default"
|
||
```
|
||
|
||
To execute:
|
||
|
||
JSON
|
||
|
||
|
||
|
||
`chaos run region-delay-experiment.yaml --journal-path=region-delay-journal.json`
|
||
|
||
Generate a detailed report:
|
||
|
||
HTML
|
||
|
||
|
||
|
||
`chaos report --export-format=html region-delay-journal.json > region-delay-report.html`
|
||
|
||
|
||
|
||
|
||
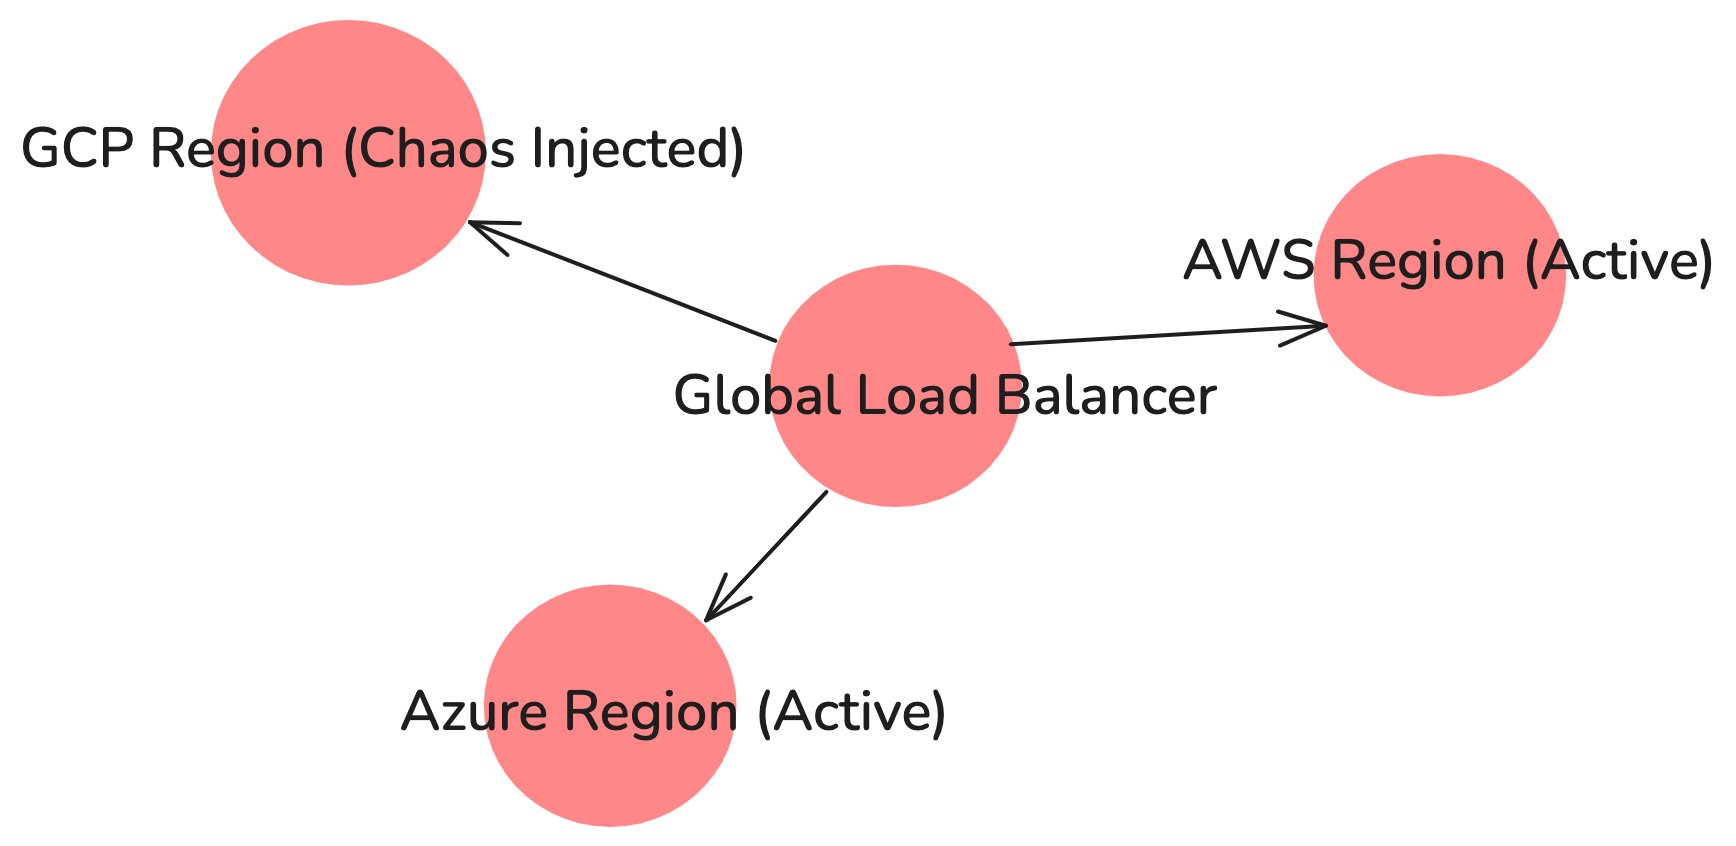
*Figure 4: Multi-cloud chaos engineering: Simulating cloud-region failures across AWS, Azure, and GCP using a global load balancer.*
|
||
|
||
## More Chaos Toolkit Scenarios
|
||
|
||
In addition to basic pod failures and latency injection, Chaos Toolkit can simulate more complex failure scenarios:
|
||
|
||
- **Injecting memory/CPU stress in Kubernetes pods** : Test how applications behave under high CPU or memory consumption.
|
||
- **Shutting down a database instance** : Simulate a database failure to verify if the system can handle database outages gracefully.
|
||
- **Network partitioning between services** : Introduce network partitions to analyze the impact on microservices communication.
|
||
- **Scaling down an entire service** : Reduce the number of available replicas of a service to test auto-scaling mechanisms.
|
||
- **Time-based failures** : Simulate failures only during peak traffic hours to observe resilience under load.
|
||
|
||
These real-world scenarios help identify weak points in distributed architectures and improve recovery strategies.
|
||
|
||
## Integrating Chaos Engineering into CI/CD Pipelines
|
||
|
||
To ensure that resilience testing becomes an integral part of the software development lifecycle, organizations should **automate chaos experiments** within CI/CD pipelines. This allows failures to be introduced in a controlled manner before production deployment, reducing the risk of unexpected outages.
|
||
|
||
### Why Integrate Chaos Testing into CI/CD?
|
||
|
||
- Automates resilience validation as part of deployment.
|
||
- Identifies performance bottlenecks before changes reach production.
|
||
- Ensures services can recover from failures without manual intervention.
|
||
- Improves **Mean Time to Recovery (MTTR)** by simulating real-world issues.
|
||
|
||
### Chaos Engineering in CI/CD Workflow
|
||
|
||
A typical CI/CD-integrated chaos testing workflow follows these steps:
|
||
|
||
- **Developer commits code** : Code changes are pushed to the repository.
|
||
- **CI/CD pipeline triggers build and deploy** : The application is built and deployed to Kubernetes.
|
||
- **Run chaos experiments** : Automated chaos testing is executed after deployment.
|
||
- **Observability and monitoring** : Prometheus, Datadog, and logs collect system behavior metrics.
|
||
- **Verify system resilience** : If service health checks pass, the deployment proceeds.
|
||
- **Rollback if needed** : If the system fails resilience thresholds, auto-rollback is triggered.
|
||
|
||

|
||
|
||
|
||
*Figure 5: Integrating Chaos Engineering into CI/CD: Automating resilience testing with Kubernetes and Istio.*
|
||
|
||
### Example: Automating Chaos Testing in GitHub Actions
|
||
|
||
Below is an example of how you can automate Chaos Toolkit experiments in a GitHub Actions CI/CD pipeline:
|
||
|
||
YAML
|
||
|
||
|
||
|
||
```
|
||
name: Chaos Testing Pipeline
|
||
on:
|
||
push:
|
||
branches:
|
||
- main
|
||
jobs:
|
||
chaos-test:
|
||
runs-on: ubuntu-latest
|
||
steps:
|
||
- name: Checkout Code
|
||
uses: actions/checkout@v2
|
||
- name: Install Chaos Toolkit
|
||
run: pip install chaostoolkit
|
||
- name: Run Chaos Experiment
|
||
run: chaos run pod-kill-experiment.json
|
||
- name: Validate Recovery
|
||
run: curl -f http://myapp.com/health || exit 1
|
||
```
|
||
|
||
Key steps explained:
|
||
|
||
- The pipeline triggers **code push** events.
|
||
- The **Chaos Toolkit** is installed dynamically.
|
||
- The **pod-kill experiment** is executed against the deployed application.
|
||
- A **health check** ensures the application recovers from the failure.
|
||
- If the health check fails, the pipeline **halts the deployment** to avoid releasing unstable code.
|
||
|
||
### Validating Results After Running Chaos Experiments
|
||
|
||
After executing chaos experiments, it’s essential to **validate system performance**. The **chaos report** command generates detailed experiment reports:
|
||
|
||
JSON
|
||
|
||
|
||
|
||
`chaos report --export-format=html /app/reports/chaos_experiment_journal.json /app/reports/chaos_experiment_summary.html`
|
||
|
||
How to analyze results?
|
||
|
||
- If the system maintains a steady state → The service is resilient.
|
||
- If anomalies are detected → Logs, monitoring tools, and alerting mechanisms should be used for debugging.
|
||
- If failure cascades occur → Adjust service design, introduce circuit breakers, or optimize auto-scaling policies.
|
||
|
||
## Best Practices for Running Chaos Experiments
|
||
|
||
1. **Start with a steady-state hypothesis** : Define what a "healthy" system looks like before introducing chaos.
|
||
2. **Begin with low-level failures** : Start with 100ms latency injection before increasing failure severity.
|
||
3. **Monitor system metrics** : Use Grafana and Prometheus dashboards to track failure impact.
|
||
4. **Enable auto-rollbacks** : Ensure failures are reverted automatically after an experiment.
|
||
5. **Gradually increase chaos level** : Use controlled chaos before introducing large-scale failures.
|
||
|
||
## Conclusion
|
||
|
||
For adopting Chaos Engineering, one thing became clear to me: it's not just about breaking things — it's about building trust in our systems. Whether you're running **Java, Node.js, Kubernetes, or Istio**, these practices give you a controlled way to test your application’s limits and prepare for the unexpected.
|
||
|
||
By incorporating tools like **Chaos Monkey** and **Chaos Toolkit** and combining them with Kubernetes-native chaos experiments, we’ve been able to validate failovers, test latency handling, and even simulate region-level outages - all without putting production at risk.
|
||
|
||
If you’re just starting, take it step by step. Start small, automate experiments where possible, and track everything. The end goal isn’t chaos — it’s confidence.
|
||
|
||
Thanks for reading, and happy chaos engineering!
|
||
|
||
## **References**
|
||
|
||
- [Principles of Chaos Engineering](https://principlesofchaos.org/) – Foundational concepts and lifecycle
|
||
- [Chaos Toolkit Documentation](https://chaostoolkit.org/) – Official docs and plugins
|
||
- [Chaos Monkey for Spring Boot](https://codecentric.github.io/chaos-monkey-spring-boot/) – Failure injection for Java microservices
|
||
- [Chaos Engineering on Kubernetes](https://kubernetes.io/blog/2018/12/31/chaos-engineering/) – Real-world guide by Kubernetes
|
||
- [Istio Fault Injection](https://istio.io/latest/docs/tasks/traffic-management/fault-injection/) – Network and delay simulation in service mesh
|
||
|
||
Chaos Monkey
|
||
Chaos engineering
|
||
Kubernetes
|
||
Spring Boot
|
||
microservices
|
||
|
||
|
||
Opinions expressed by DZone contributors are their own.
|
||
|
||
Comments
|